


Released in 2017 by Epic Games, Fortnite graces the halls of the online multiplayer battle royale world with its own take on the genre. Like its predecessors, the premise itself is straightforward enough; you go in, you gear up, and you try to survive till the end.
Safe to say, the craze for battle royales have not failed to elude us, and with Fortnite, it is even more apparent, with its colorful graphics and a very unique construction mechanic that allows players to create obstacles for cover, among many other things within their realms of imagination.
System requirements
Like all games, there is some minimum standard your PC or mobile device has to adhere to in order to run Fortnite. If you’re playing on PC, be sure to have at least an Intel Core i3. Intel’s integrated graphics are enough to run Fortnite, as long as they are at minimum, an Intel HD 4000 or the Iris Pro 5200. For Windows users, you will also need to have Windows 7 or higher installed. And for those of you running a Mac machine, your system needs to be equipped with the mac OS X Sierra (10.12.6) at the very least, and support Metal API.
Aside from PC, Fortnite is also available on most mobile devices like your phone or tablet, as well as all major gaming consoles. However, there are certain caveats, depending on the console you’re playing on. Be sure to look these up before deciding to get the game.
Diving In
As we’ve mentioned, the whole premise of the game is pretty cut-and-dry. So what better way to learn than to just go in and experience it for yourself? You’ll start off in a practice area, otherwise known as Spawn Island. There, you’ll find buildings, guns and ammo lying around for the taking. The actual match itself will start to load once 100 players have gathered, so use this time to get a feel for the game’s mechanics. Once you think you’re ready (or even if you don’t), you’ll automatically be thrust into the Battle Bus and dropped off into the Fortnite map.
The key of the game is survival, so let’s talk about how many ways you can die in the game. The obvious one would be getting eliminated by another player. And of course, getting caught in the Storm. There’s also fall damage as well, generally above three storeys. That last one can slip under your nose if you’re new so be cautious about jumping off tall places.
Gameplay Know-How
Now, let’s talk about some basic survival tips that will come in handy. These aren’t super technical tricks, but rather some general advice to help you get into the right mindset when playing to win.
First and foremost, you’ll want to avoid jumping off the Battle Bus immediately when it allows you to. A vast majority of players do this, and sure enough, a lot of them are going to end up dead seconds upon touching the ground. Yes, you get to take the first crack at finding loot and gearing yourself up, but your risk of dying also goes up, especially when there are other players landing just next to you. Again, this isn’t always going to turn out badly, and you are well within your means to take the risk. However, we would suggest you to at least familiarize yourself with the map first before going all Rambo. Otherwise, just wait until you’re in a fairly safe space to dive, with less players and by direct consequence, less risk of death.
Additionally, potion management is vital, as not only does it take up space in your inventory, it can save you in an emergency. For this reason, you want to use up all your small shield bottles first before burning into your large ones. Not only does it free up room, your small shield bottles can’t be used when your shield level is at 50% or higher, as opposed to large shield bottles, which can be used whenever.
As one of the core components of the game, it is absolutely vital that you learn how to build, and how to build fast. This will give you important cover, whether it’s to camp or to heal up in a fight. To that end, you should make it a habit to gather materials with your pickaxe when you’re on the move and not fighting. There isn’t really a height limit in this game, so you’re free to build as tall a structure as your heart desires, but do be wary that one false move can send you off the edge and put you on a one-way trip to the afterlife. You should also take note that the structure will collapse on itself if the foundation is destroyed. More on this later on.
Gun rarity is also a thing in Fortnite, and they go in the following order from lowest to highest rarity: grey, green, blue, purple, and gold. Generally, the higher the rarity, the higher the damage, so be sure not to pass it up if you find a rare gun in your way. For beginners, the Assault Rifle or SMG are both great to pick up because they’re so easy to use. You may also want to get into the habit of keeping a healthy stock of weapons in your inventory to be used in different situations, whether you’re trying to snipe someone, or getting ambushed by another player.
Another tip we’d like to share is to make use of crouching. Crouching will lower the noise of your footsteps, making it easier for you to sneak up on someone. You can also turn this around and try to listen for sounds of running, hammering, or the most probable — gunshot to figure out whether enemies are nearby and which direction they are in.
This should be a no-brainer, but never leave any obvious trails for players to hunt you down. That means you should avoid completely destroying trees or houses while you’re moving around. Instead, leave them with at least a portion of their health. This will make it harder for players to realize that someone else had been in the area, and they can be used as emergency cover if you’re suddenly dragged into a gunfight.
Lastly, if you do die, don’t leave the match just yet. You will be put in spectator mode, allowing you to watch the player who killed you skedaddle about, only to be gunned down by the next player around the corner. Petty reasons aside, it’s also a good learning opportunity to see if other players have any tricks or strategies up their sleeve. And if you feel like you’ve been dying one too many times for the same reason, this will be a good time to self-reflect and identify the mistakes you’ve been making.
Building Tips
As you probably know, building is crucial to becoming a good Fortnite player. And while we can’t guarantee our advice will take you to the top 1% of the competition, it’s probably a good place to start. Here are some things to keep in mind:
You want to build for protection. Again, you’re trying to be the last person standing in the match, and your building should serve to facilitate that. Even if you consider yourself to be a fairly aggressive player, you should always be of the mind that whatever you build should go towards keeping you alive for longer. That means whenever you find yourself under enemy fire, your immediate thought should be to erect a wall as quickly as you can. After which, you can build yourself a set of stairs for a vantage point to launch a counterattack. And as you do, make sure to build walls around you to cover your blindspots. One trick is to confuse players by building multiple stairs so that they can’t figure out your immediate location.
As with all games, taking the time to familiarize yourself with the map goes a long way in keeping ahead of the other players. Know which places offer the resources you need, and what is the most efficient way to get yourself an abundance of material in the shortest time possible. For example, you can look towards the giant trees for wood, stones for brick, and cars for metal. Do note that harvesting metal can be risky, since cars are often found in places with lots of cover for enemies to hide in, and that hammering them with your pickaxe will generate a ton of noise. Naturally, you can loot defeated enemies as well, but that’s not exactly a sustainable way of gathering resources. That being said, you should still keep in mind to strip them clean of any resources they have outside of artillery, if you have the room for it.
You want to take the time to learn how to edit your structures as well. In edit mode, you get this gridded view of your constructs and can modify each individual tile to your liking. Use this to create doors or ramps to give yourself a means of escape in case the need ever arises. This will save you a lot of time as compared to demolishing walls outright. Another trick while you’re in edit mode is that it allows you to see through them with your opponents being none the wiser. For example, you can look at a wall and enter edit mode, find enemies on the other side, keeping them in your scope as you immediately edit in a window for a quick, clean kill.
Another important tip to keep in mind is to be familiar with your materials. There are only 3 materials in-game, each with different levels of defensive capabilities. Sure enough, metal is the strongest of the 3 with its high HP, but for that very same reason, it takes the longest amount of time to build with. As such, it’s always good to stick to wood during a fight, and save your bricks and metals for when you’re building a proper shelter. And speaking of shelters, if you’re familiar with Minecraft, you should be able to apply similar building methodologies here. What we mean is that you want to build to your advantage. That could mean creating enough room for you to maneuver around in case your opponents take the fight indoors, or creating false rooms and pathways to confuse them. You can also drop loot in random places as bait and place traps for other players to get caught in.
There’s more to building than just creating shelters or traps. Building the right structures at the right time will help you outsmart an opponent and give you an edge even in the midst of battle. For example, if you see someone building, you can sneak up to them and build on top of their structure without them finding out that you’re actually there. This is done by using the same material they’re using to mask the noise from your building and making them believe that it’s coming from them. You can also choose to box them in with roofs before swooping in from a blind spot to get the kill.
Crafting Guide
Aside from creating structures, you can also craft your own weapons and traps as well. You’ll need two things to make this happen. First, materials. Second, schematics.
For weapons, those within the same classification and rarity generally will share the same requirements for crafting, with some laser weapons being the only exception to the rule. For details on materials needed to complete a weapon, you can always check back on the collection book under the armory section. When it comes to weapons, you want to have a relatively diverse set to cover combat at all ranges. You also want to have guns that your ammo can go into. For example, if all you have are medium bullets, you will want to prioritize crafting Assault Rifles over SMGs.
Be sure to also study the meta to find out which guns offer the most damage that particular season, and work towards adopting those into your gameplay. And as we’ve mentioned before, don’t forget to harvest as many materials as you can while you go around the map. But make sure to farm efficiently, as you don’t want to waste time harvesting stuff for weapons you’re not going to craft.
While traps are generally more straightforward in terms of usage compared to weapons, finding ways to utilize them properly can sometimes require true ingenuity. There are several types of traps, primarily those that damage your opponent, those that heal, and those that launch players into the sky. To get kills, we’ll evidently be more focused on damage traps, so that’s what we’ll mainly talk about here. You would think to place these on floors, but they can go up on walls and ceilings as well. So if you lure a player into a closed space, try to place your traps where they would least suspect and most likely to walk into. Doors are a common area that fit the bill, as even experienced players can forget to check due to their carelessness.
When it comes to healing traps, they are good for when you want to save time from bandaging up, or when you’re out of bandages altogether. And as for launchpads, they help provide you with some extra mobility by allowing you to glide through the air temporarily. However, do note that you will be a sitting duck if there are any enemies nearby.
Weekly Challenge Walkthroughs
Outside of killing players and surviving, players can also try to complete certain challenges in order to get more XP and level their Battle Pass quicker. In Fortnite, these weekly challenges typically get refreshed every Thursday at 7 AM PT/ 10 AM ET/ 3 PM BST. There are 8 challenges in total: 7 Epic Quests and 1 Legendary Quest. At the time of this writing, here are the guides on how to complete the weekly challenges in Season 6 Week 12.
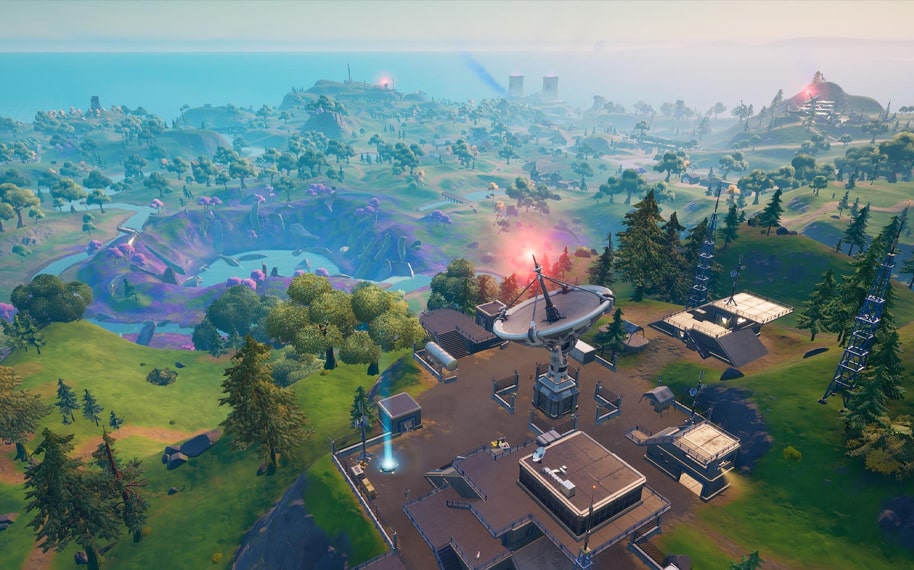
Visit the Zero Point
In case you didn’t know, the Zero Point is located at the center of the map. All you have to do is reach it and you’ll complete the quest.
Craft Pistols
This one is also easy enough. You don’t necessarily need to go out of your way to craft the super high-end stuff. Just do the bare minimum and get this quest off your checklist.
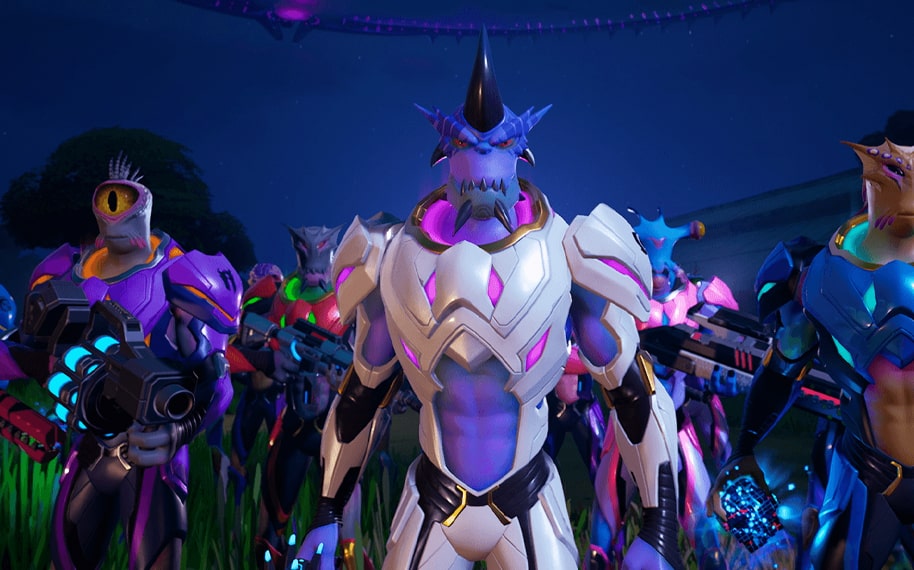
Defeat a Spire Guardian
This is where things can get a little dicey, especially if you’re unprepared. To find Spire Guardians, you will have to make your way to — you guessed it — the Spires. There is a set number of these on the map, and you can choose to drop close to them from the get-go. However, it is ill-advised to try and defeat the Spire Guardian without any gear, so make sure you don’t land too close to the Spire. Instead, go for some place nearby where you can find weapons and ammo before heading to beat the Guardian. Alternatively, you can try to stick a landing at the very top of the Spire. As Spire Guardians spawn at the ground level, you will immediately start off at a higher vantage point. However, the gear you’ll find here is purely up to luck, as with all weapons you find off the map. So if you end up being under-equipped to fight the Guardian, don’t hesitate to retreat.
While not too difficult to deal with due to its relatively low HP, the Spire Guardian packs a rather nasty punch, so discretion is key here.
Hunt predators
Predators in this instance refer to the wolves as well as the raptors you see in the game. They spawn in a bunch of different locations, so they shouldn’t be too difficult to locate. However, they do tend to roam around a bit, so you may need to search around the area if you can’t find them immediately. While they aren’t too tough to kill, they often travel in packs, which can be dangerous, especially if another player is already hot on your tail.
Tame boars outside of Colossal Crops
To do this, keep a healthy supply of vegetables to feed the boars, keeping your distance until they are ready to be interacted with. Otherwise, they’ll almost immediately attack you on sight.
Chicken glide at Colossal Crops
Much like the previous one, you will need to tame the chicken, so to speak. In essence, it’s just sneaking up to a chicken and grabbing it. After which, make your way to the Colossal Crops and you should be able to glide with the chicken every time you jump, thereby completing the challenge.
Raid an artifact from Stealthy Stronghold and Coral Castle
To complete this quest, you will need to get an artifact from the two locations. Each location has 4 of these in total, and only one is required from both to get this challenge done.
In Stealthy Stronghold, the artifacts in question come in the form of statues in the shape of a bird. Locations are as follows:
First artifact — found slightly to the west of the center area, at the lowest floor of the ruins. There’s a chest that can be found next to it.
Second artifact — head up to the surface, and proceed east from the previous statue’s location. You should find the second artifact just peeking out the side of a tree.
Third artifact — found slightly north of the second artifact’s location, tucked within one of the ruins.
Fourth artifact — further up north from the third artifact’s location, by the corner of a crumbled wall.
For Coral Castle, the artifacts will resemble the image of a frog. Locations as follows:
First artifact — can be found around the southern edge of the structure.
Second artifact — can be found submerged within the center structure of Coral Castle.
Third artifact — can be found underneath an arch to the north. Also hidden underwater.
Fourth artifact — can be found at the top of a hill to the northeast.
Once you’ve completed the first 7 of the weekly challenges, you can then move on to the last Legendary Challenge, which is to spend gold bars. There are a number of ways you can do that, so just figure out which works best for you or what you enjoy spending on most. There is no sense in keeping them around, as they don’t carry over between seasons and will just go to waste if left lying around.